
BEFORE YOU START
What you need
- The ACD module and attendant-console editing rights are available. Cisco and Teams routes also require their respective modules and connections.
- Each queue has a suitable script and number. The route, required CTI ports or SBC connection, and at least one eligible device must be operational.
- Prepare attendant accounts and authorised directories. A private Teams app additionally requires trusted HTTPS, Entra configuration and app approval.
Create the console and queue
Where to work: Calling Features → Calls → Attendant console → New console
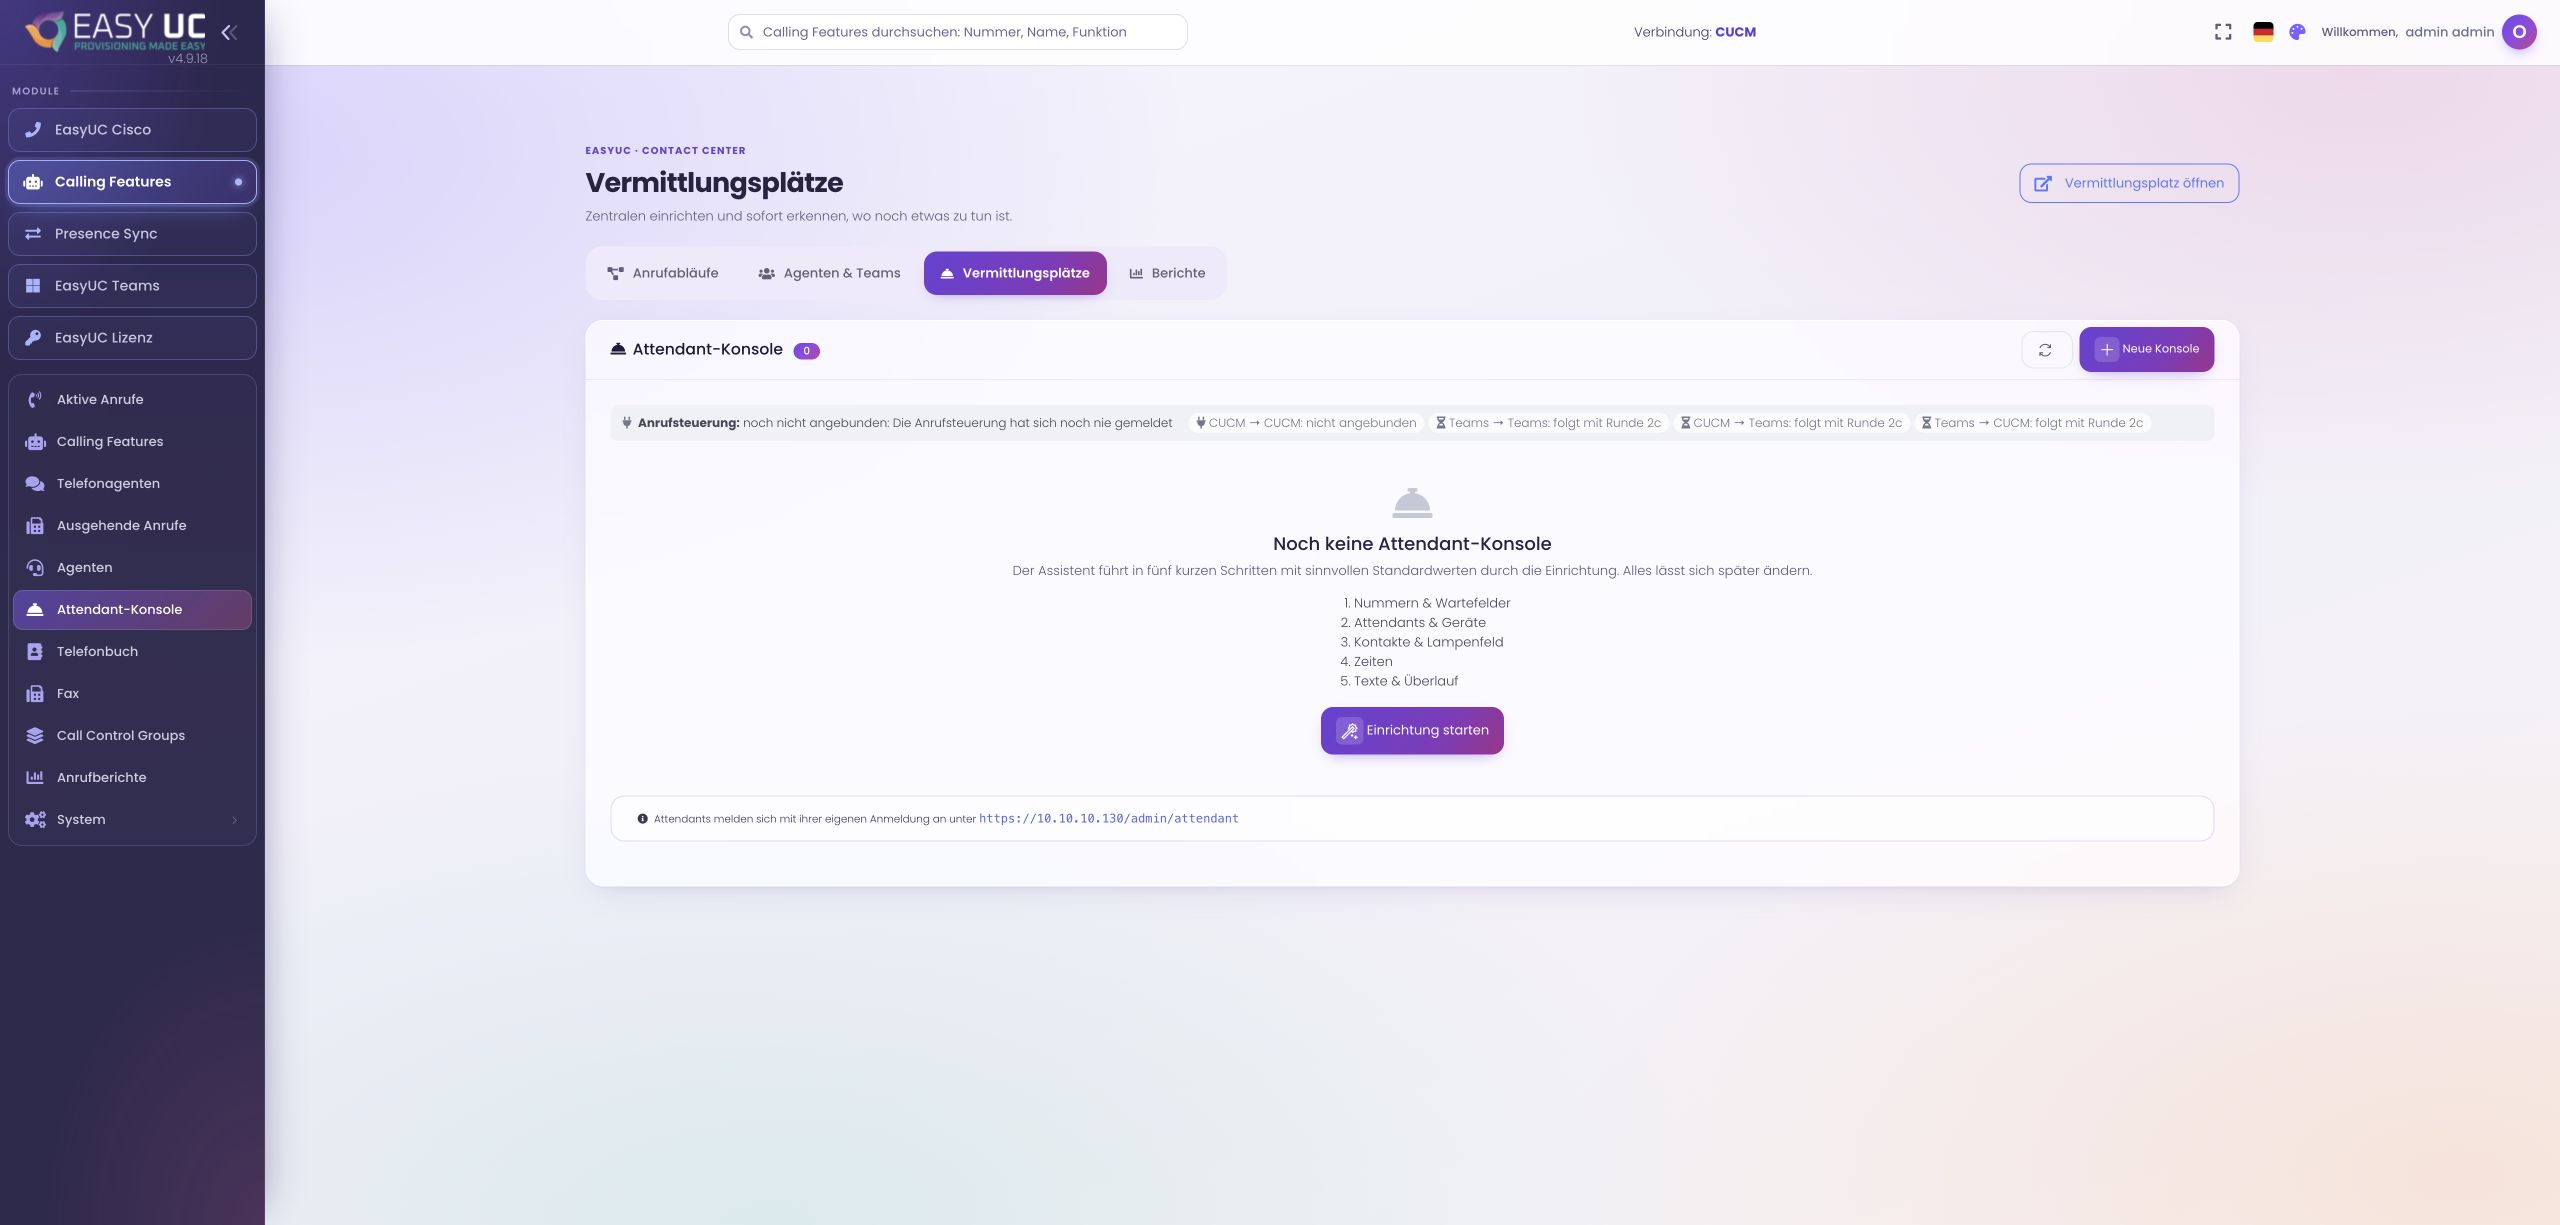
Start New console or Start setup. Under Numbers & queues, give the console a clear name and choose its connection. Add at least one queue and assign the intended ingress under Script (number). Confirm responsibility using the actual dialled number. The original capture shows setup entry; the lab has no completed console or connected active call control.
Assign people and suitable devices
Where to work: Setup wizard → Attendants & devices
Add the people who will staff reception and assign an eligible calling device to each. For Cisco, verify the device association; Teams requires tenant, user UPN and number. A Teams device inventory entry alone does not configure delivery, so check the actual route as well. If credentials are generated, collect them from the one-time dialog for the intended person, then save and continue.
Build the directory and busy-lamp field
Where to work: Setup wizard → Contacts & busy-lamp field
Select the directories reception should access and configure the required keys. Keep common destinations easy to find so calls need not wait during lengthy searches. Check numbers and contact associations using concrete examples. Line state and Teams presence provide different information; unknown must not be interpreted as available. Personal favourites can help later in the workspace without changing central contacts or access rights.
Define hours, greetings and overflow
Where to work: Setup wizard → Hours → Texts & overflow
Set opening hours or deliberately choose Always day. Review the greeting, waiting announcement and night action. Define maximum waiting time and overflow handling so callers have a planned next step under load. Align these rules with the script flow: its reachable Queue branch must hand calls to the attendant queue. Save setup and inspect the Checklist tab.
Sign in and test answering on the actual device
Where to work: Checklist → Workspace /admin/attendant
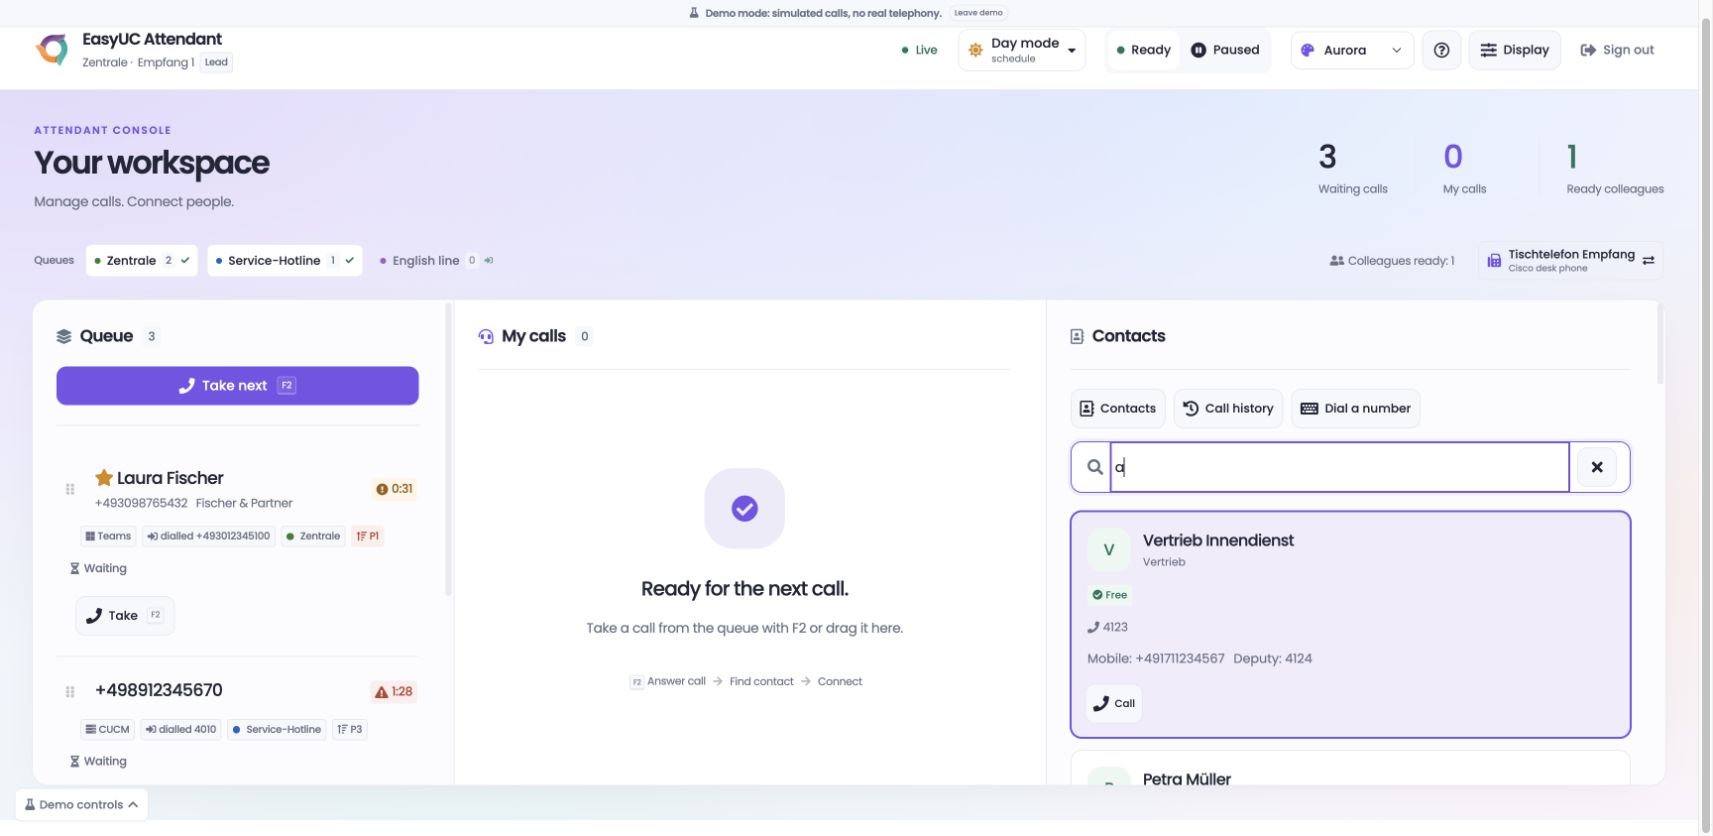
Resolve missing prerequisites in the checklist. Sign in at /admin/attendant, select the configured device and start Ready. Call the ingress number and choose Take next. Follow the device prompt: at a Teams endpoint, the user answers personally. Check the announcement and audio in both directions. A successful web login and a visible call card do not fully validate the phone connection.
Test transfer and return behaviour
Where to work: Workspace → Contacts → Transfer / Consult
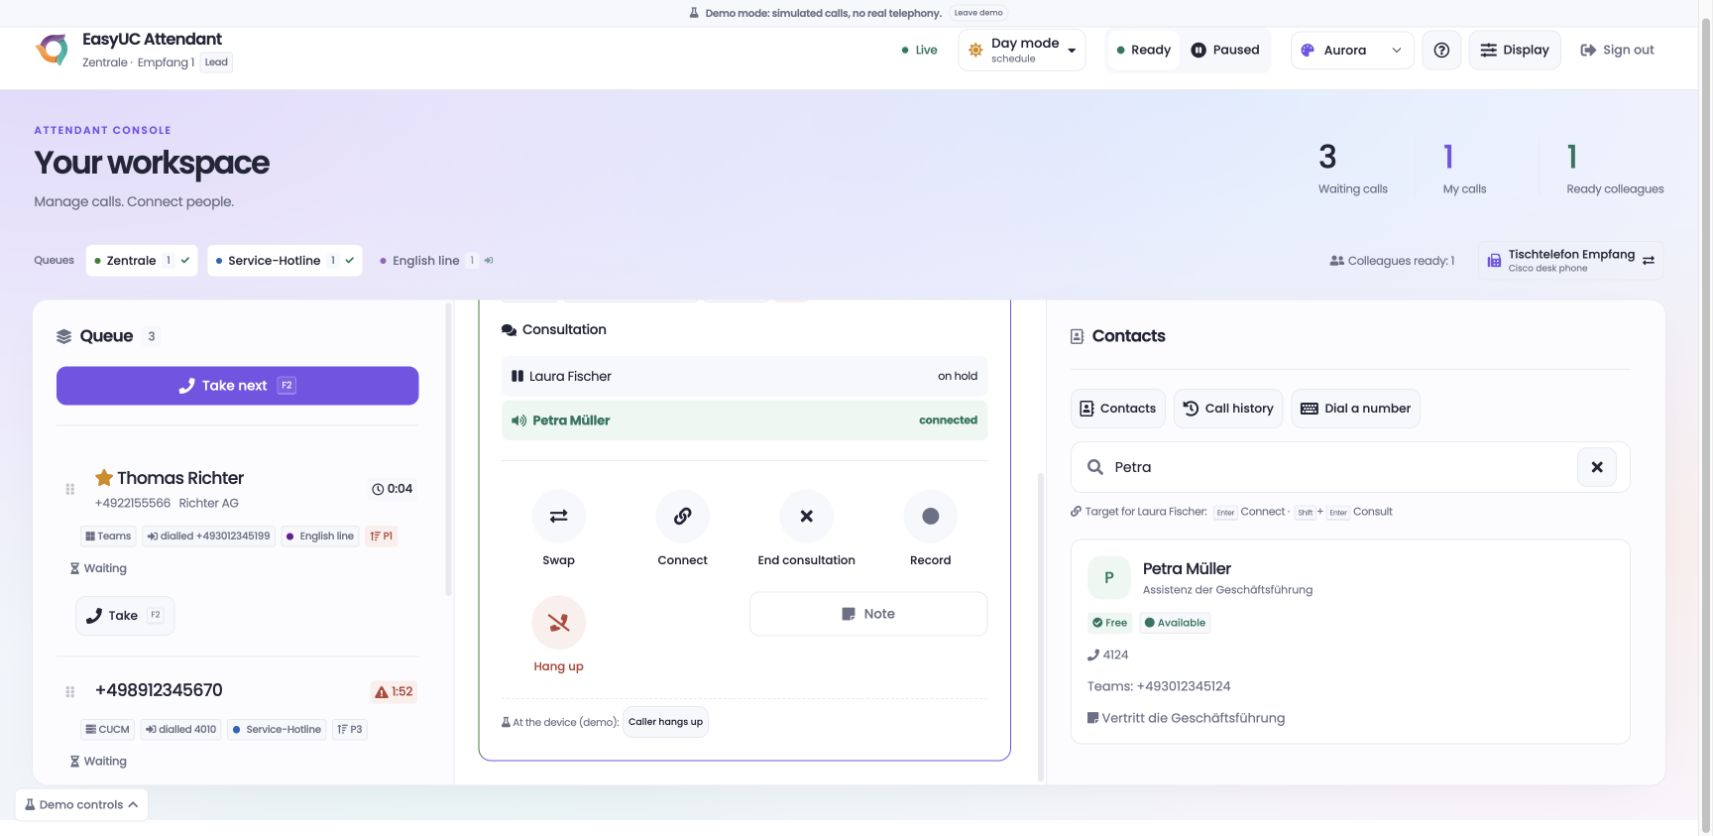
During the test call, find an authorised contact and use the offered Transfer or Consult action. Available actions depend on device, route and call anchor. First test successful target pickup, then an unanswered destination and return behaviour. Repeat with night mode and overflow. The call journal then helps review your completed calls for the selected console’s current day.
The result
The configured console brings queues, contacts and operating hours together. Once device and route checks pass, an available attendant can accept calls and use the transfer actions offered for that call.
Good to know
- Teams endpoints do not have general remote answering. The console does not provide universal control of direct calls outside EasyUC; offered actions apply to the specific managed call.
- A private Teams app opens the web interface inside Teams; it does not install EasyUC on arbitrary phone displays. Parking, conferencing, camp-on and voicemail control are outside the functionality described here.
Captures come from the EasyUC lab and demo environment. Captions identify setup and simulation states. If the interface is not yet available in your language, its original language is labelled. Available features depend on the version, permissions and configured connections.