
ACD for Cisco CUCM
ACD and attendant console for Cisco CUCM
EasyUC distributes calls to agents and attendant consoles. Configure voice menus, queues and service hours in the browser. JTAPI and CTI provide the connection to Cisco CUCM.
Connection through route points and CTI ports
On CUCM your service number is a CTI route point, the pilot number. EasyUC registers with CUCM over JTAPI and monitors the route point. When a call comes in, EasyUC takes control.
Announcements and menus play through CTI ports. To CUCM these are ordinary devices, and audio runs as G.711. When an agent accepts the call, it is connected to that agent's phone.
Which devices agents use is up to CUCM: Cisco desk phones, or Jabber and Webex as softphones. With the built-in SBC, Teams users join in as well.
One call, step by step
- 1
Call to the pilot number
A customer dials
+49 40 3861 7700. CUCM delivers the call to the CTI route point. - 2
JTAPI takes over
EasyUC answers and starts the IVR script assigned to the route point.
- 3
Announcement and menu
A CTI port plays the greeting. The caller picks a topic with a key press.
- 4
Queue
The call waits until an agent with the right skill is available.
- 5
Offer to the agent
The agent sees number, queue and waiting time, and accepts or rejects.
- 6
Conversation and wrap-up
The call runs on the agent's phone. Afterwards the agent gets no new call for the configured wrap-up time.
Build voice menus in the browser
In the flow editor you drag blocks onto a canvas and connect them. Each block has a handful of clear properties: an announcement text, a time range, a queue. You then assign the finished script to the route point.
Enter announcement text directly in the block. Text-to-speech on the EasyUC server creates the audio file. You can also upload your own recording.
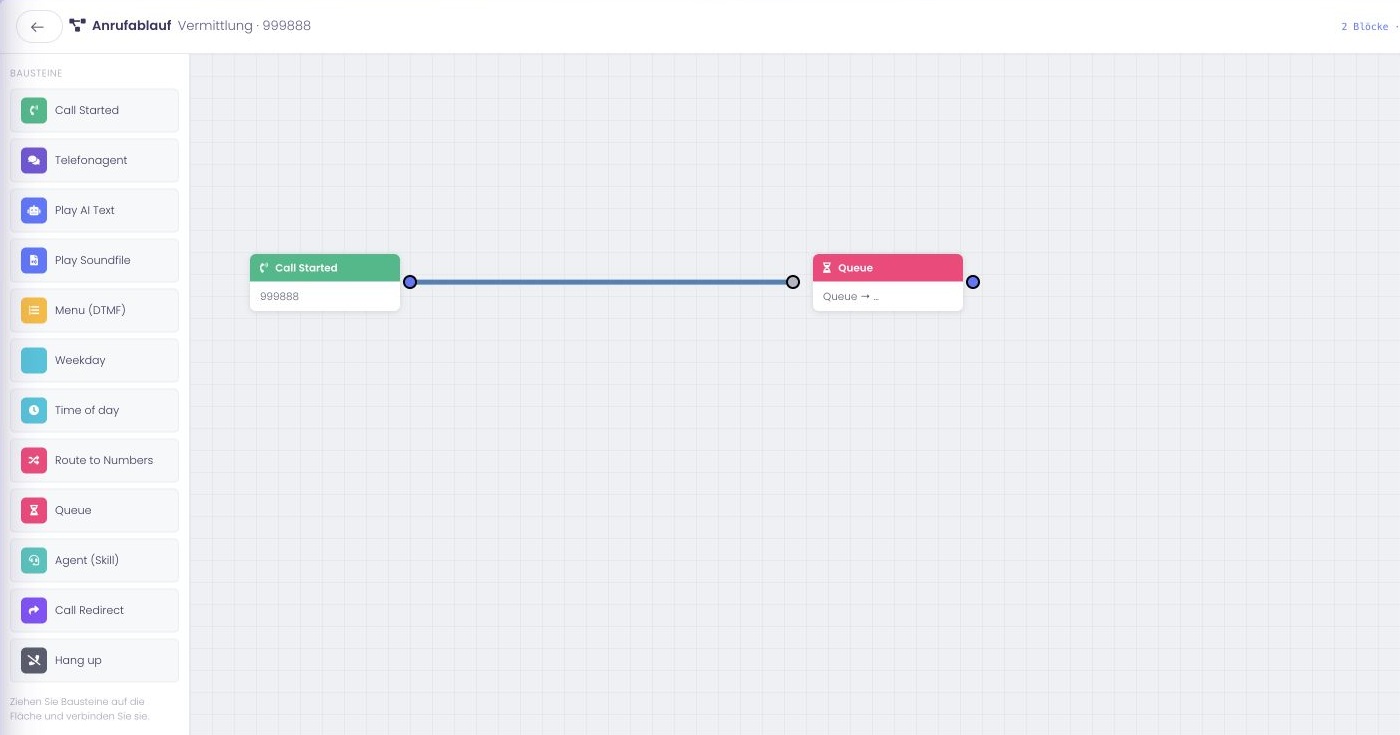
The blocks at a glance
Connect call
Answers the call on the route point. The script starts here.
Text announcement
Speaks a text you type into the block. Speech synthesis runs locally on the EasyUC server.
Sound file
Plays an uploaded audio file, such as a greeting recorded in a studio.
Menu
Waits for DTMF input and branches on the key pressed.
Weekday
Branches by day of the week, for example Monday to Friday versus the weekend.
Time of day
Branches by time, for example inside or outside service hours.
Route to numbers
Sends the call to stored numbers, such as an on-call line.
Queue
Places the call in a queue until a suitable agent is free.
Agent by skill
Offers the call to a free agent with the selected skill.
Redirect
Hands the call to another destination, such as an extension.
Hang up
Ends the call, usually after a closing announcement.
Queues, skills and levels
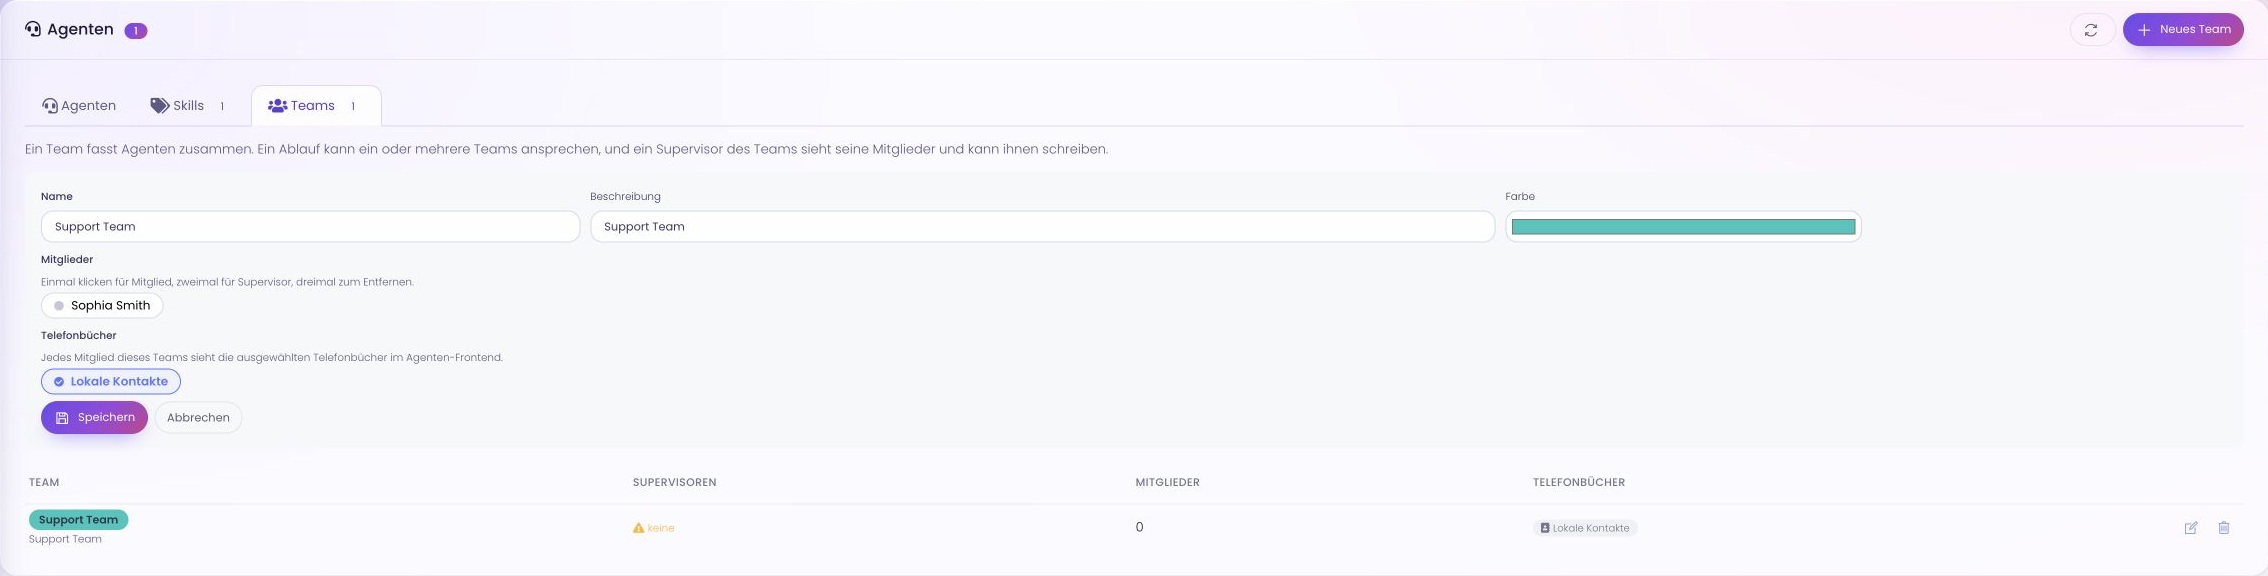
Agents get skills, for example network, new connections or billing, and a level for each skill. They also belong to teams. In the script you decide whether a call goes into a queue or straight to an agent with a particular skill.
An experienced colleague can cover several topics while a new starter begins with a single skill.
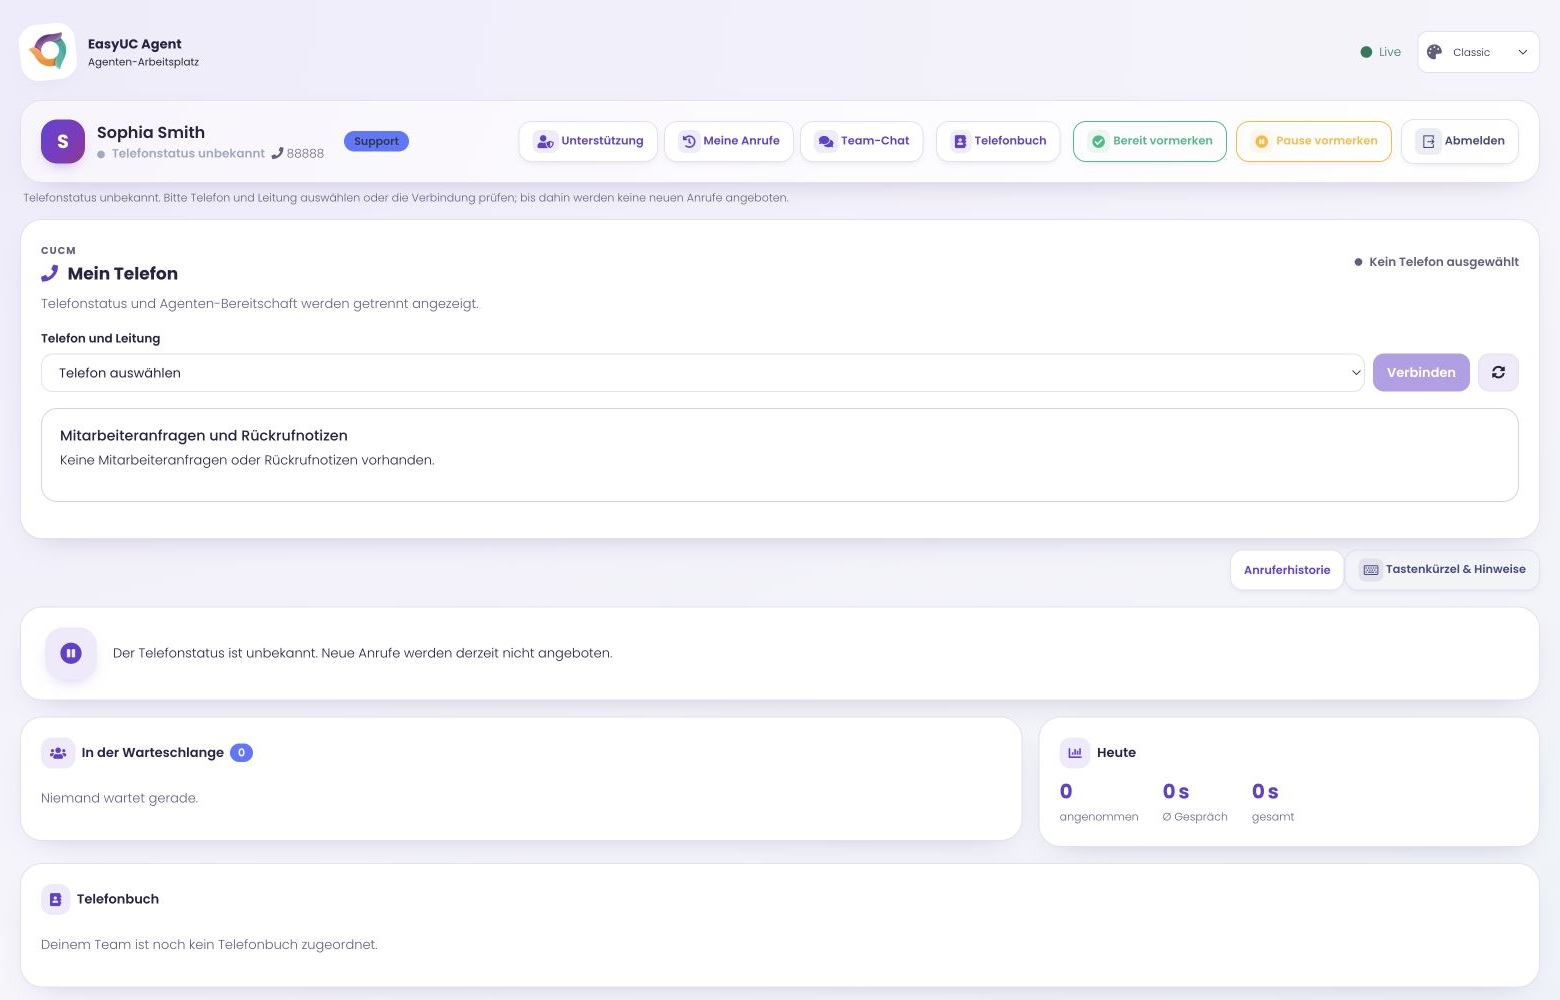
Agent states and wrap-up
Every agent is in one of five states. Only available agents are offered calls. An agent accepts or rejects each offered call.
Wrap-up time can be set between 0 and 300 seconds. That gives the agent time to finish the note before the next call arrives.
- Logged outnot signed in to the agent desktop
- Availablereceives call offers
- On a callcurrently talking
- Awaysigned in but not at the desk
- Wrap-up0 to 300 seconds after a call
Browser-based agent workspace
Agents open the agent desktop in a browser and keep using the device they know: a Cisco desk phone, Jabber, Webex or Teams. Nothing is installed on the workstation.
- Call offer with number, queue and waiting time
- Change of state with one click
- Phonebook with search
- Team chat between agents
Team status for supervisors
In the team view, supervisors see every agent's state live, with the time spent in that state. When the team needs to know something, they send a broadcast message that appears on the agent desktop straight away.
- Live state of every agent in a team
- Time in the current state
- Broadcast messages to the whole team
Attendant console for reception teams
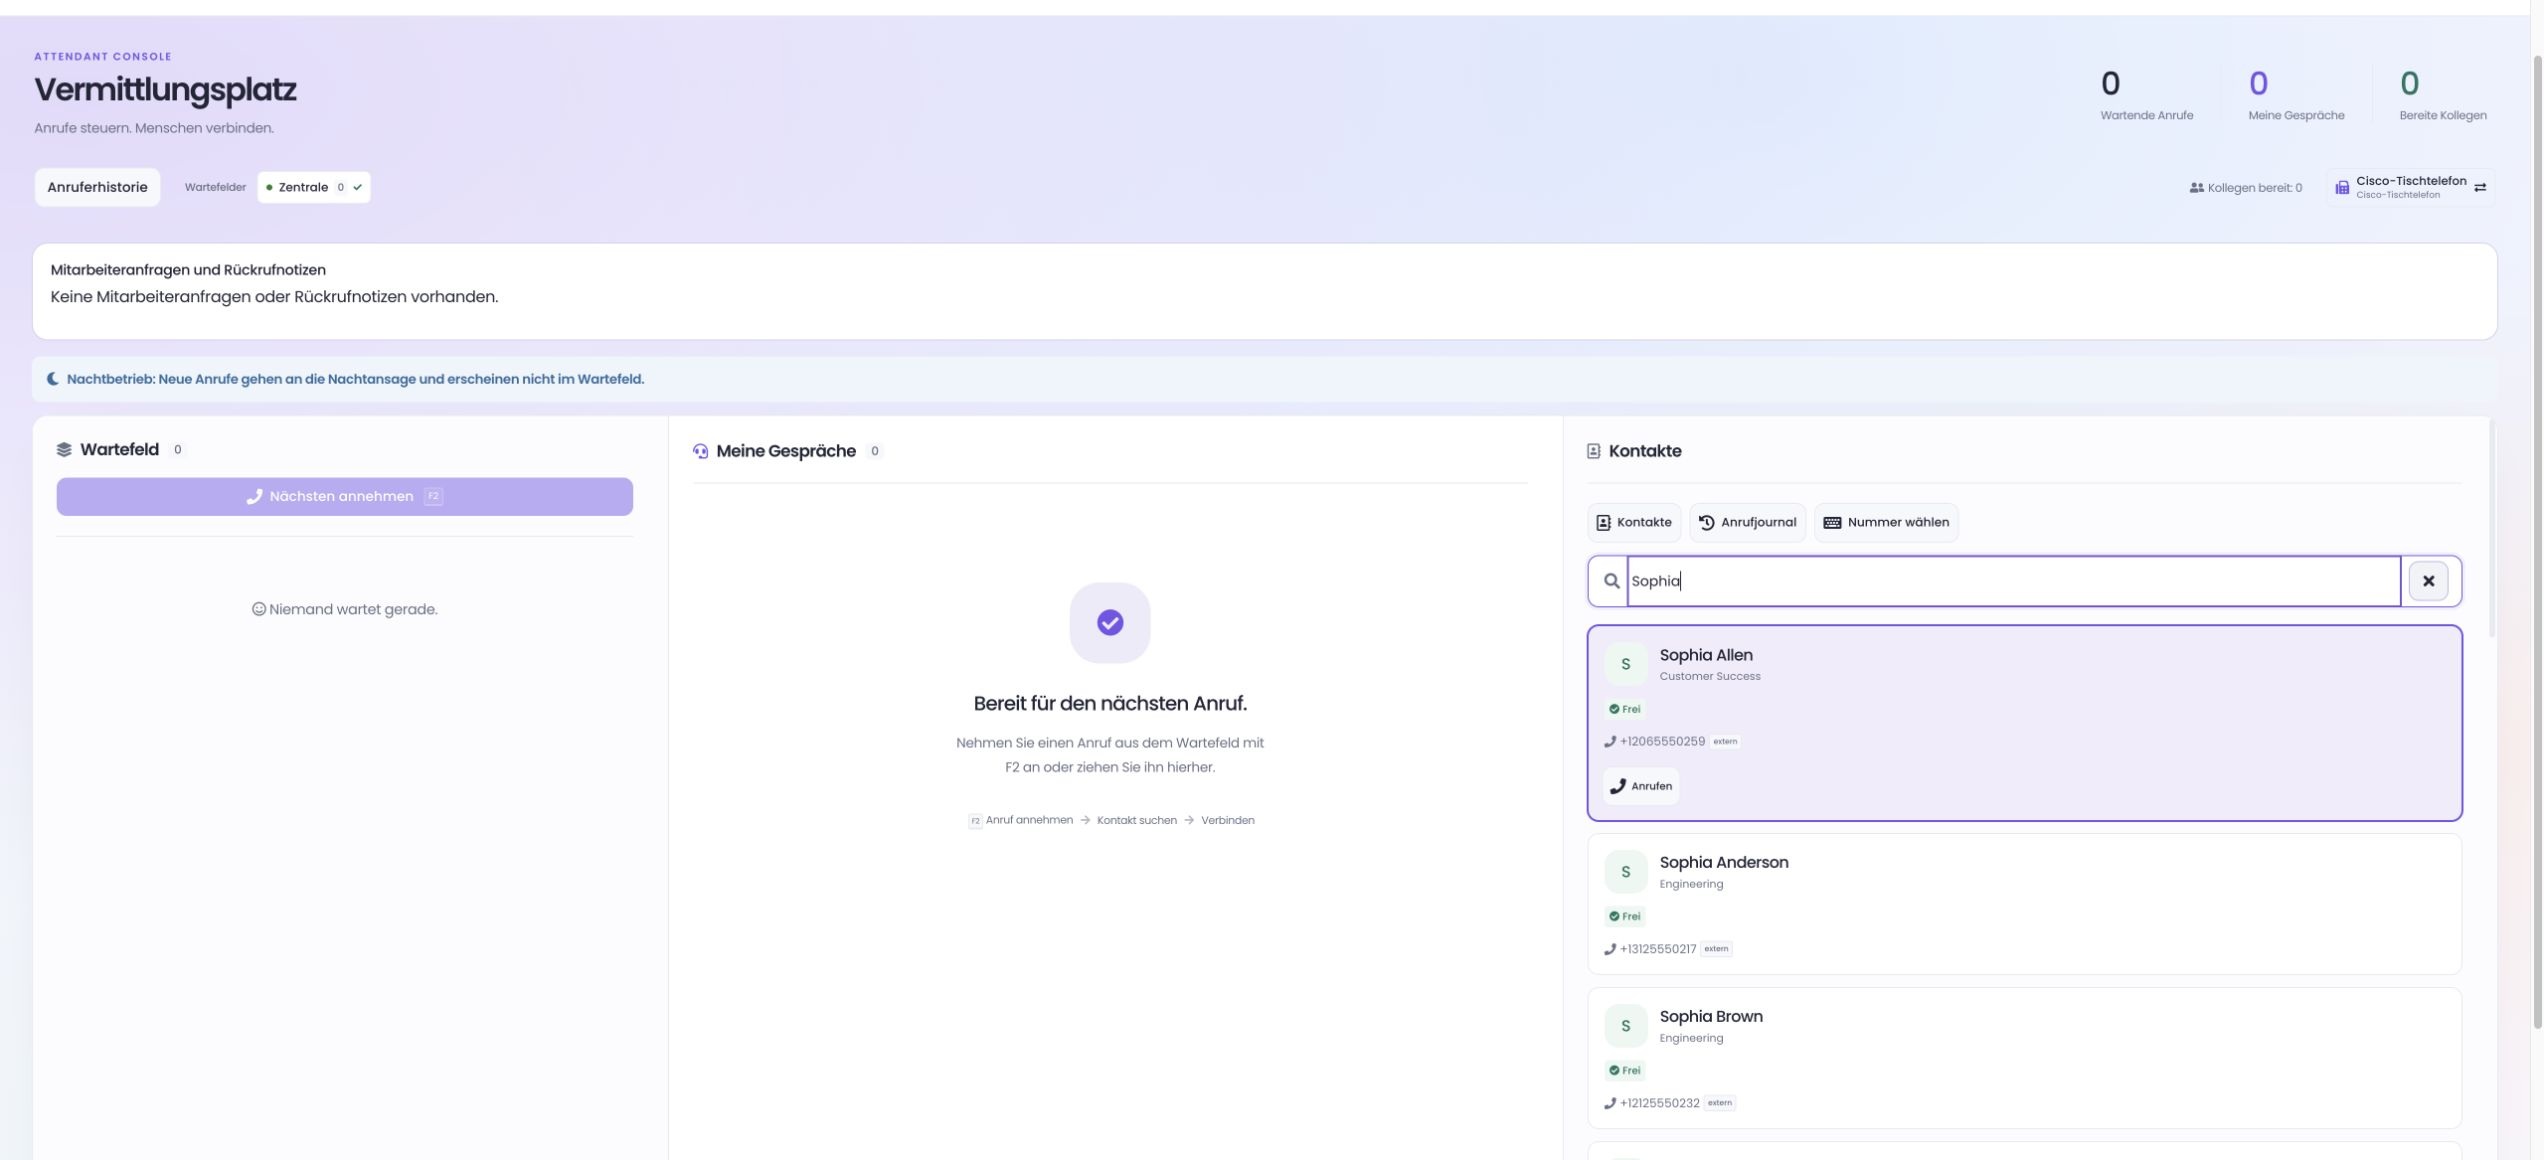
The attendant console is made for people who answer and transfer calls all day. Calls land in queues with priorities, and VIP numbers move to the front. The busy lamp field shows whether a line is free and what Teams status the person has.
If nobody answers a transferred call, it returns to the console. Anyone who misses several calls is paused automatically so that callers are not left ringing.
Queues
- priority per queue
- VIP numbers
- maximum waiting time
- maximum number of waiting calls
Overflow
- to a phone number
- to voicemail
- to another queue
- to an IVR script
- to night service
Delivery
- to all consoles at once
- directly to the console idle longest
Modes
- day, night and special modes
- weekly schedules for switching
Busy lamp field
- line state from CUCM
- Teams presence
- phonebooks with search
Call handling
- consult transfer
- recall when unanswered
- automatic pause after missed calls
Reports
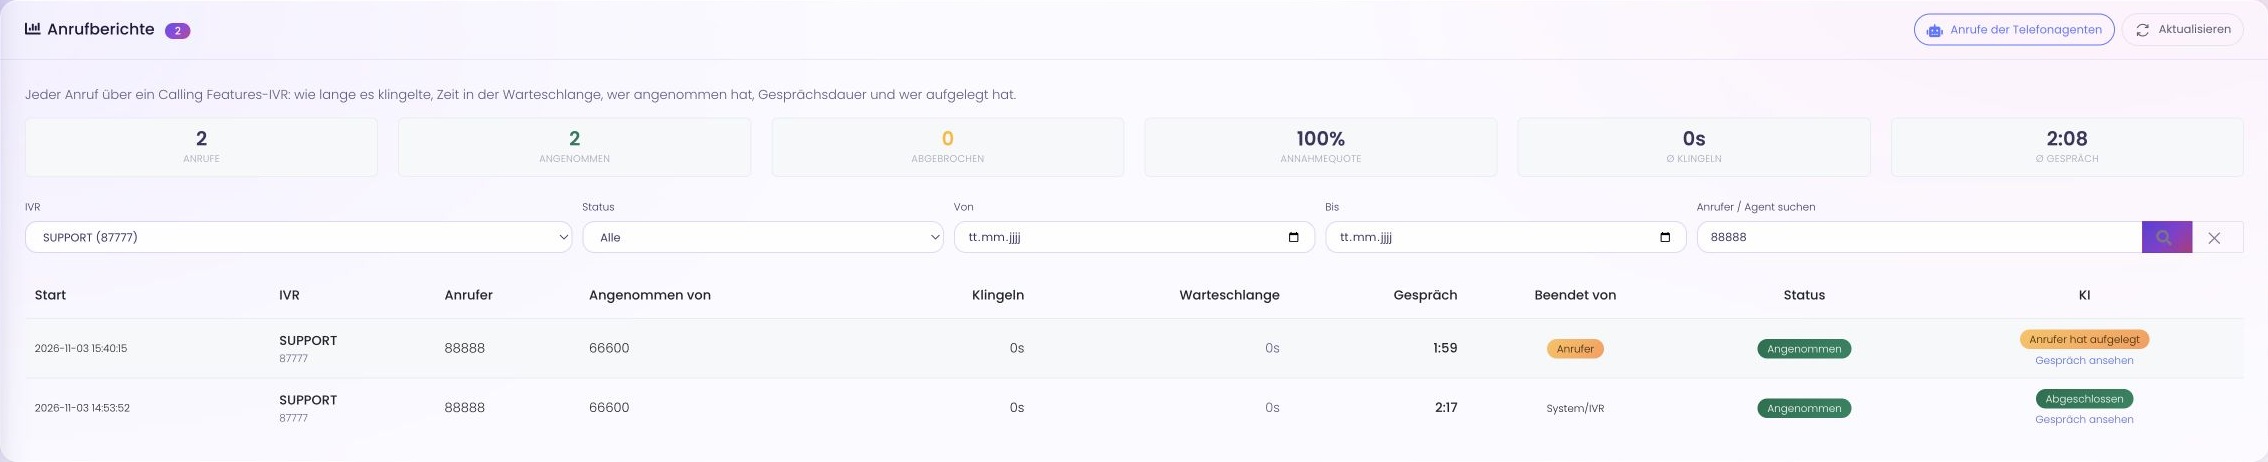
Filter call reports by IVR script, status, date, caller and agent. Trace an individual call or review call volumes over a period. Statistics by skill help with staffing plans.
The data sits in the database on your appliance and does not leave your data centre.
Specifications
| CUCM version | 11.5 or later, tested with 12.5 to 15 |
|---|---|
| Integration | JTAPI/CTI, set up over AXL |
| Entry point | CTI route point (pilot number) |
| Announcements | through CTI ports in G.711; text announcements via local speech synthesis, sound files |
| Script blocks | Connect call, text announcement, sound file, menu (DTMF), weekday, time of day, route to numbers, queue, agent by skill, redirect, hang up |
| Distribution | queues, skills with levels, teams |
| Agent states | logged out, available, on a call, away, wrap-up (0–300 s) |
| Agent desktop | browser-based; phonebook, team chat |
| Supervisor | team view with live states, broadcast messages |
| Attendant console | queues with priority and VIP numbers, overflow, day/night/special modes with weekly schedule, BLF with Teams presence, consult transfer, recall, automatic pause |
| Devices | Cisco desk phones, Jabber, Webex, Teams phones, Teams client |
| Microsoft Teams | through the built-in SBC |
| Reports | call reports by IVR, status, date, caller, agent; statistics per skill |
| Operation | OVA with K3s for VMware or Proxmox, also without internet access |
| Licensing | per concurrently logged-in agent and per attendant console |
Call distribution for your service line
Tell us how many agents work at the same time, which numbers you use and your service hours. We will demonstrate the scripts, queues and attendant setup for those requirements.
Existing customers
Licences, updates, invoices and support tickets are in the customer portal.
Go to the customer portalInside EasyUC
The EasyUC ACD
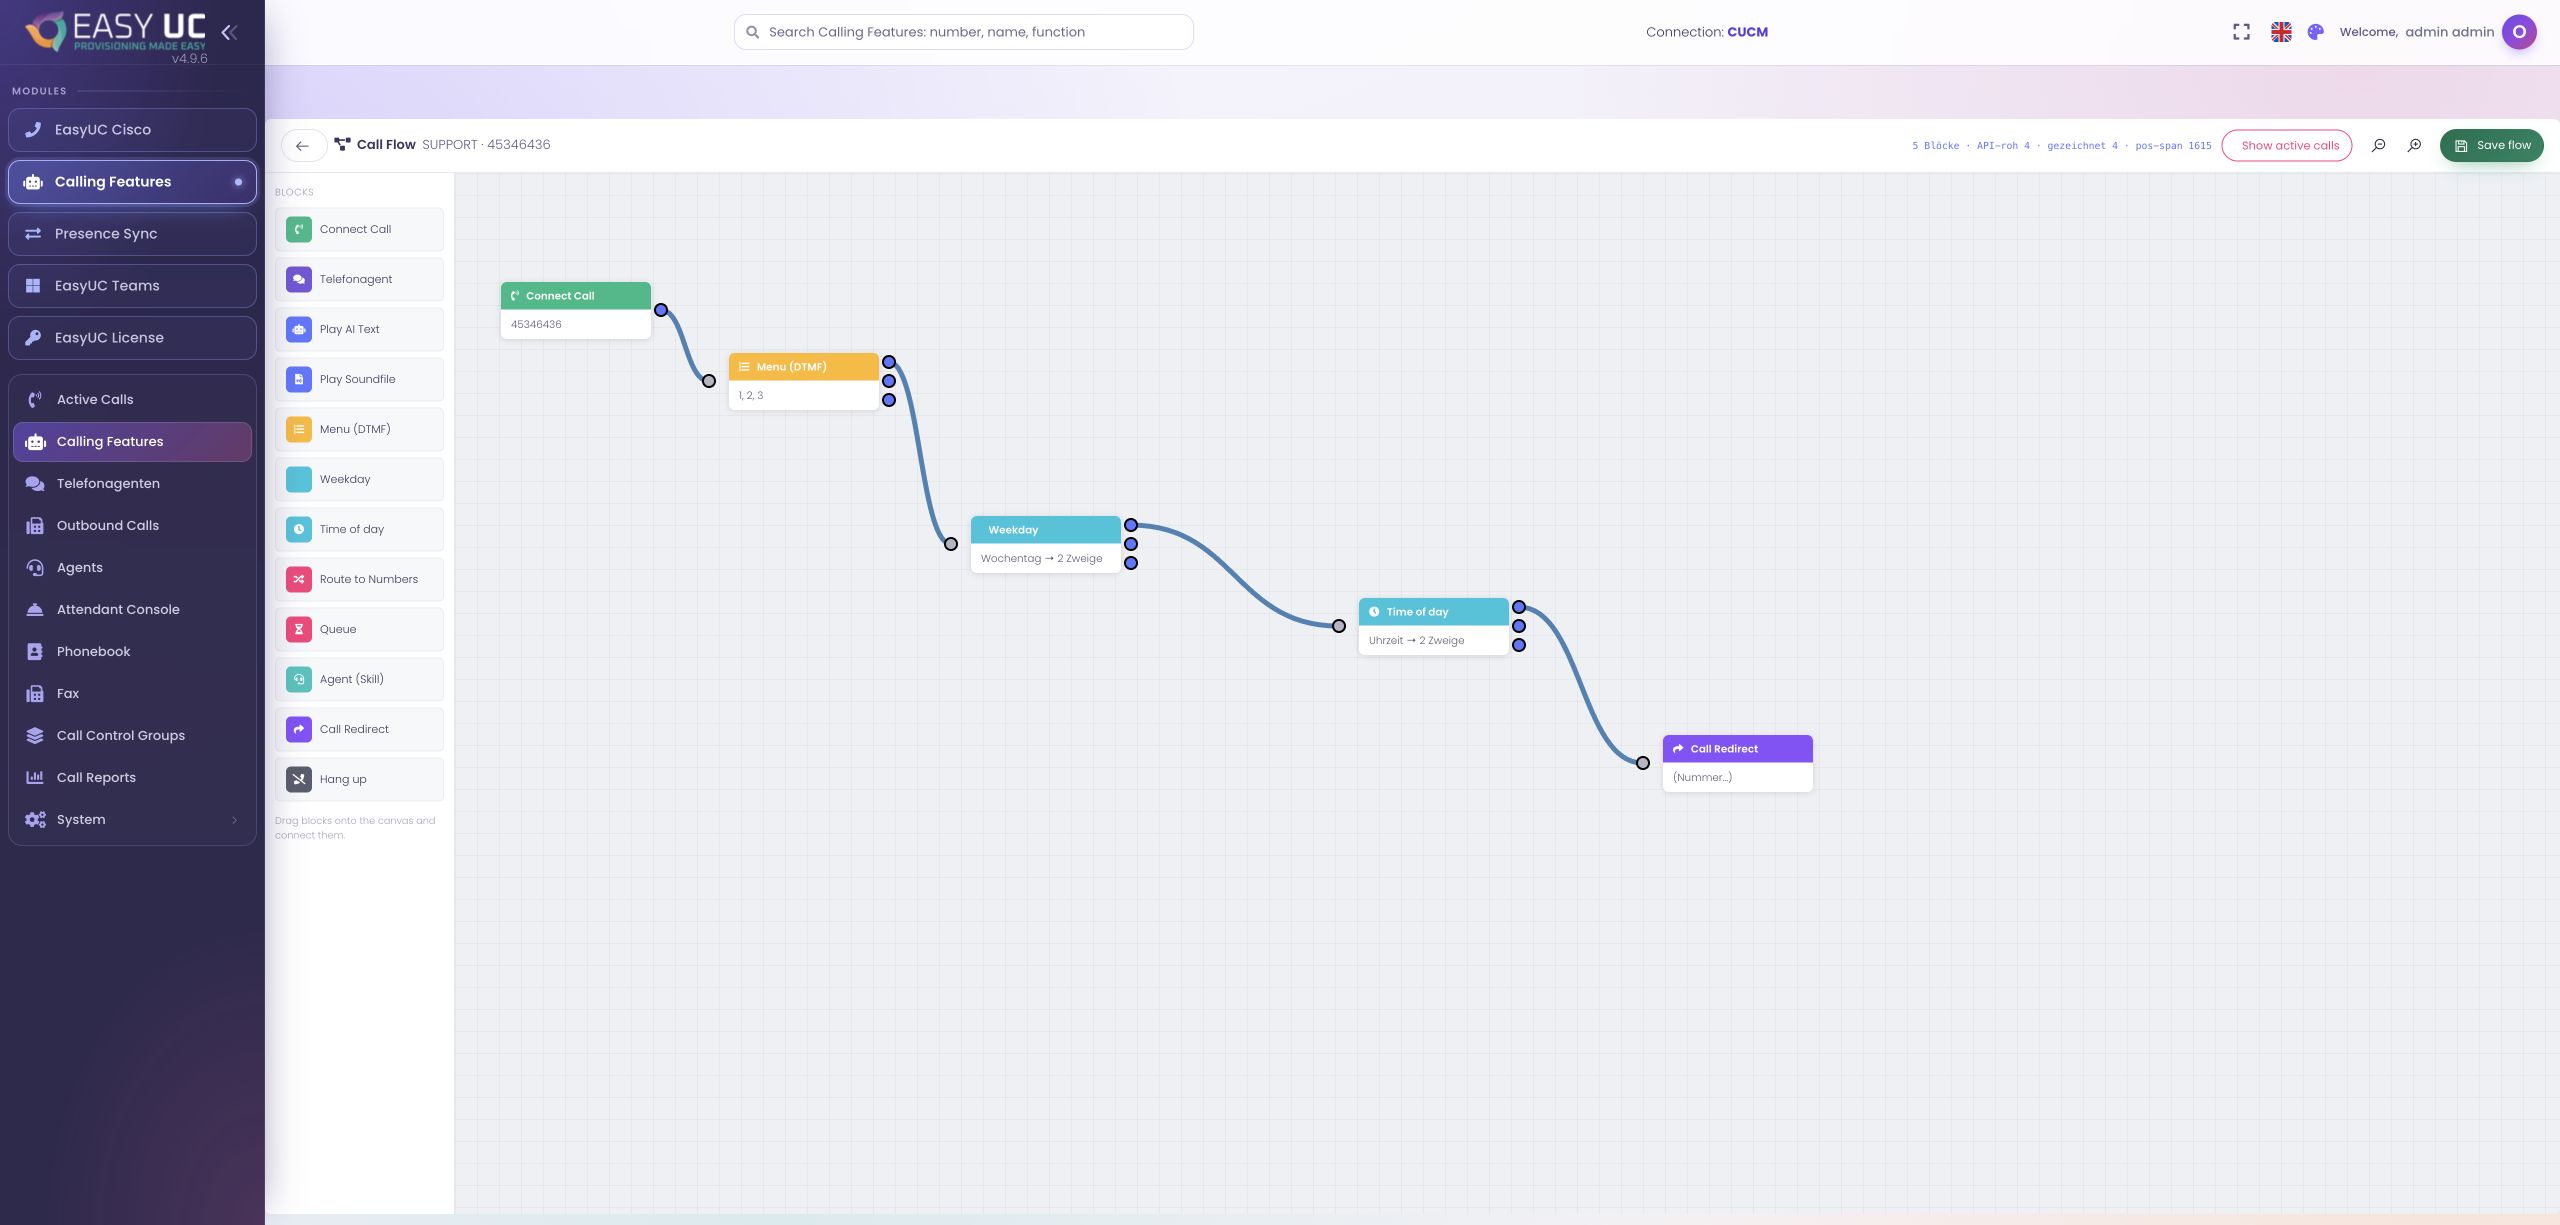
An actual view of EasyUC’s visual call-flow editor.
Visual call flow
The actual flow editor with call handling, a DTMF menu, and weekday and time-of-day rules.
These captures show the actual EasyUC interface in a lab/demo environment. Open an image to see it in more detail. Parts of the lab interface are not yet fully translated. When a matching language version is unavailable, the different screenshot language is labelled.
Features in practice
Understand and build call flows
See how individual blocks become a clear inbound call journey in the actual editor.
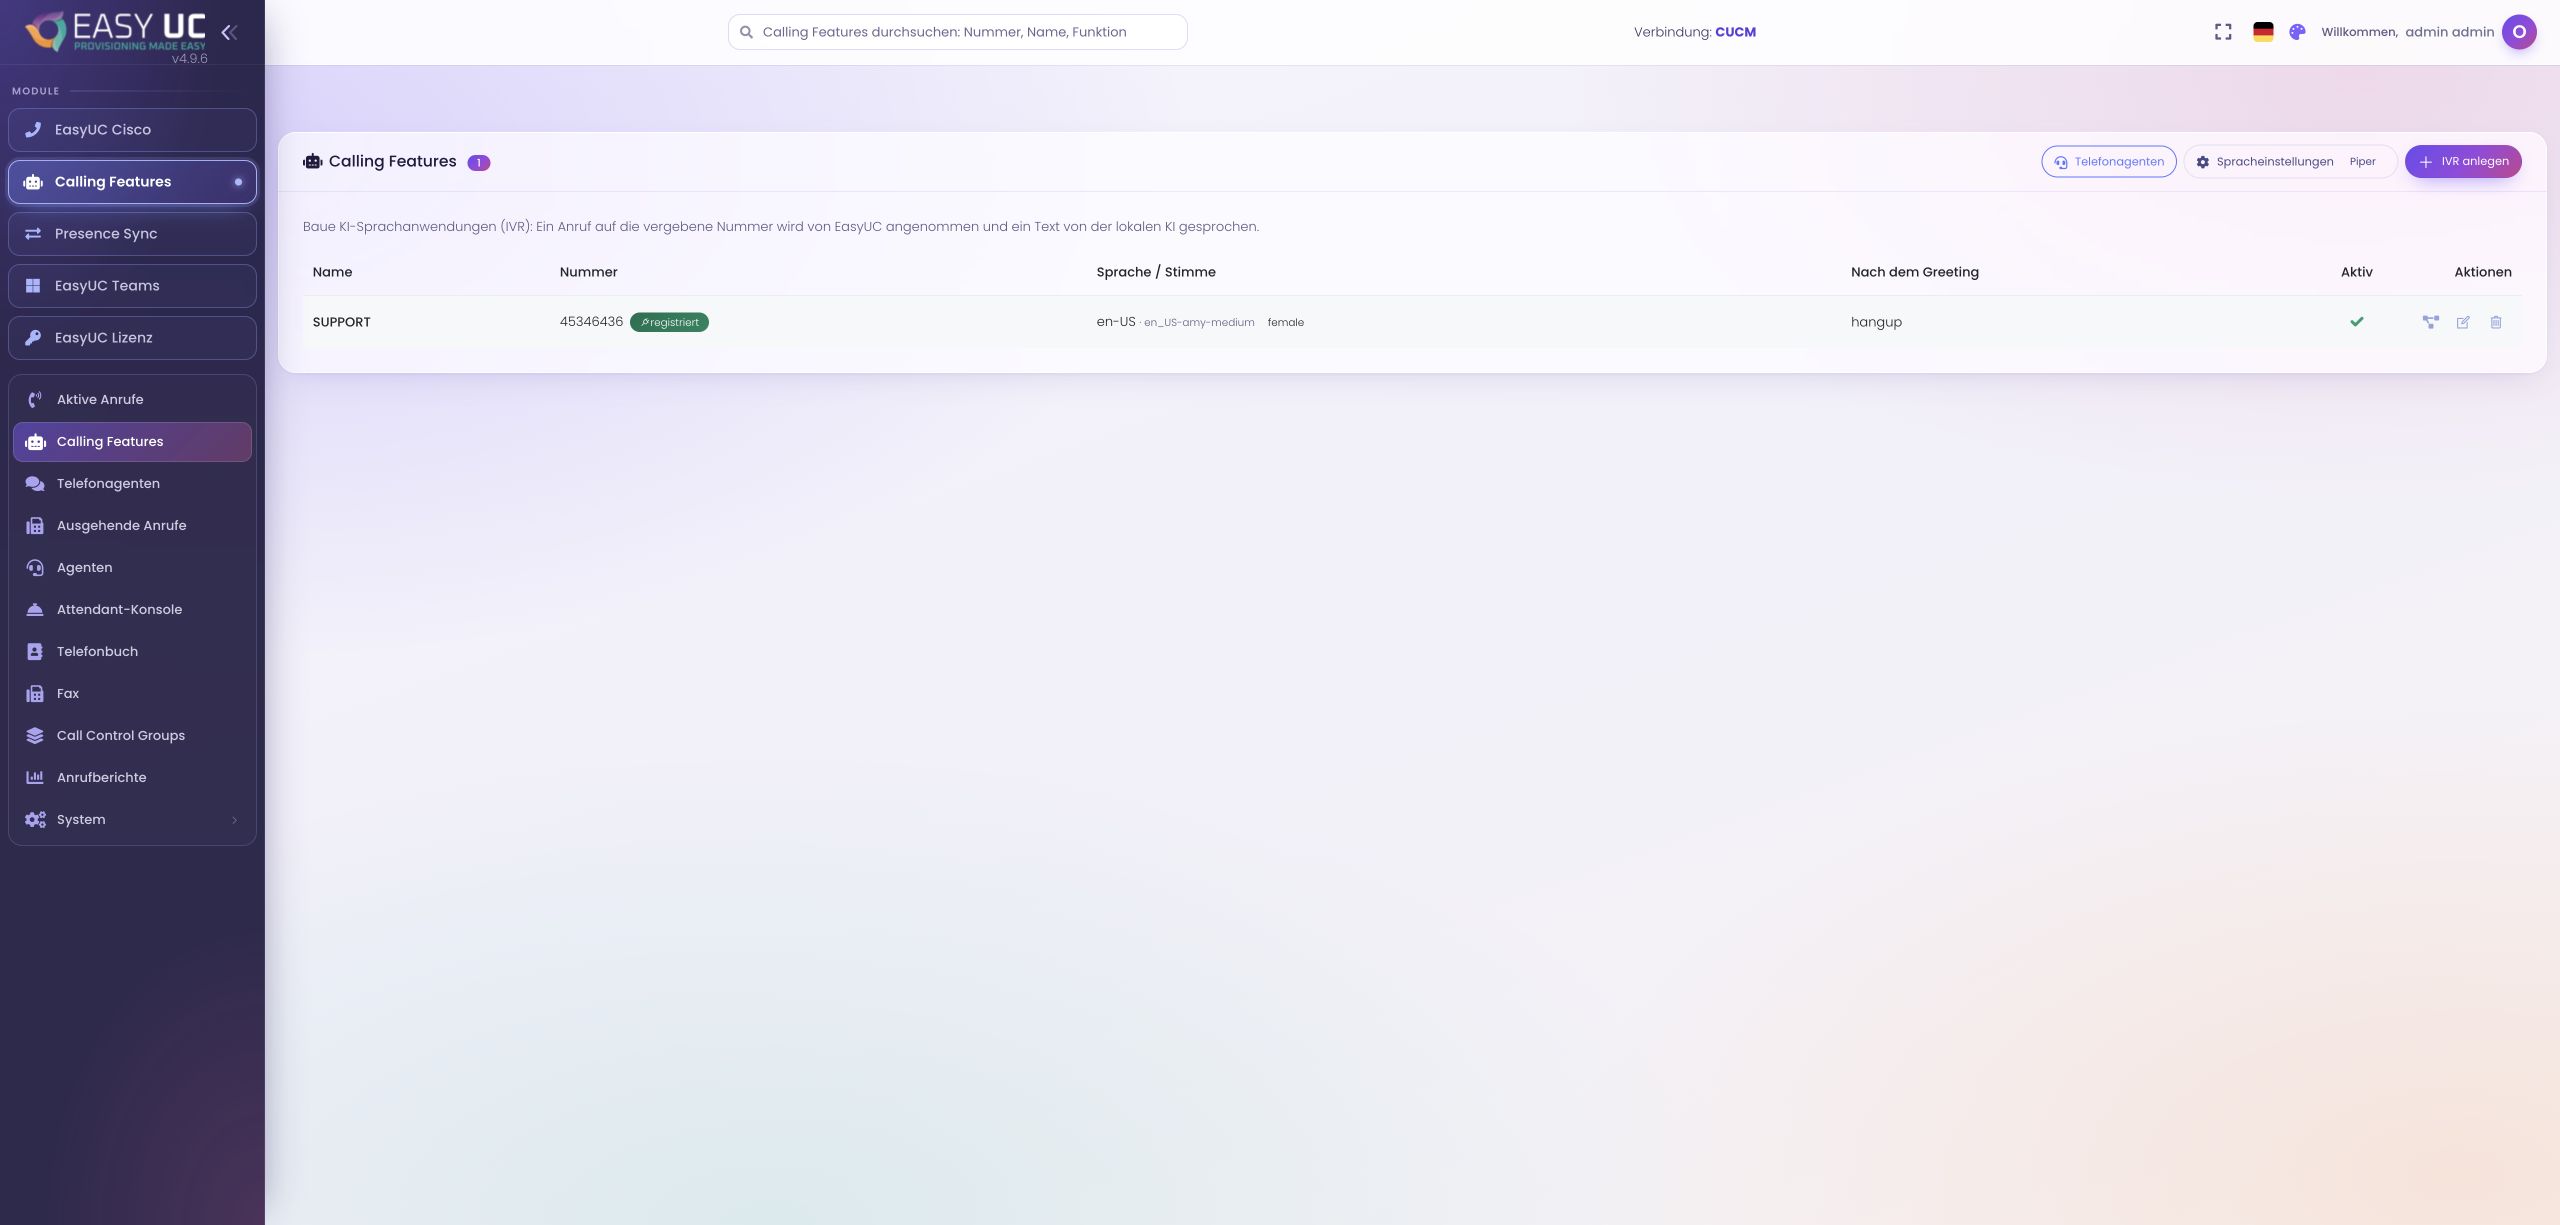
Manage voice applications centrally Match numbers to their greetings and call flows, and see activation status directly in the overview.
The ACD AI overview brings together configured voice applications. Each row shows the name and number, language and voice, action after the greeting, and activation status. The actions open the selected application’s settings or graphical flow.
EasyUC can play announcement text using local Piper voices. Voice settings show the configured speech engine and identify any additionally configured cloud voice. The number and integration determine how callers reach each application.
How to use this feature
- Open the overview
Open ACD AI and locate the voice application in the list. Compare its name, number and activation status.
- Review the greeting and next action
Review the language, voice and action after the greeting. Open the editor to change these settings.
- Edit the flow
Open the flow from the application’s actions. Connect announcements, menus and routing blocks to build the intended call journey.
- Check the integration
After changes, review the number, activation status and any telephony integration messages. Make a test call to the configured number.
Visual call flow Define how calls are answered, routed by caller choice or time, and passed to the appropriate destination.
The flow editor represents the call journey as connected blocks. For example, connect call handling to a DTMF menu, then branch by weekday or time of day. The connections show which step runs next.
The selected block’s settings appear beside the canvas. Edit menu options, destination numbers, time ranges or the time zone there. Weekday and time rules include a separate output for calls that match none of the configured rules.
How to use this feature
- Open the flow
Open the call flow for the required script. The canvas shows its existing blocks and connections.
- Connect blocks
Drag the required blocks from the left palette onto the canvas and connect each relevant output to the next step.
- Configure rules
Select a block and enter its options on the right. Apply the settings and check the outputs of your time or menu rules.
- Save the flow
Save the flow. The active-calls display then lets you see which block currently holds each ongoing call.
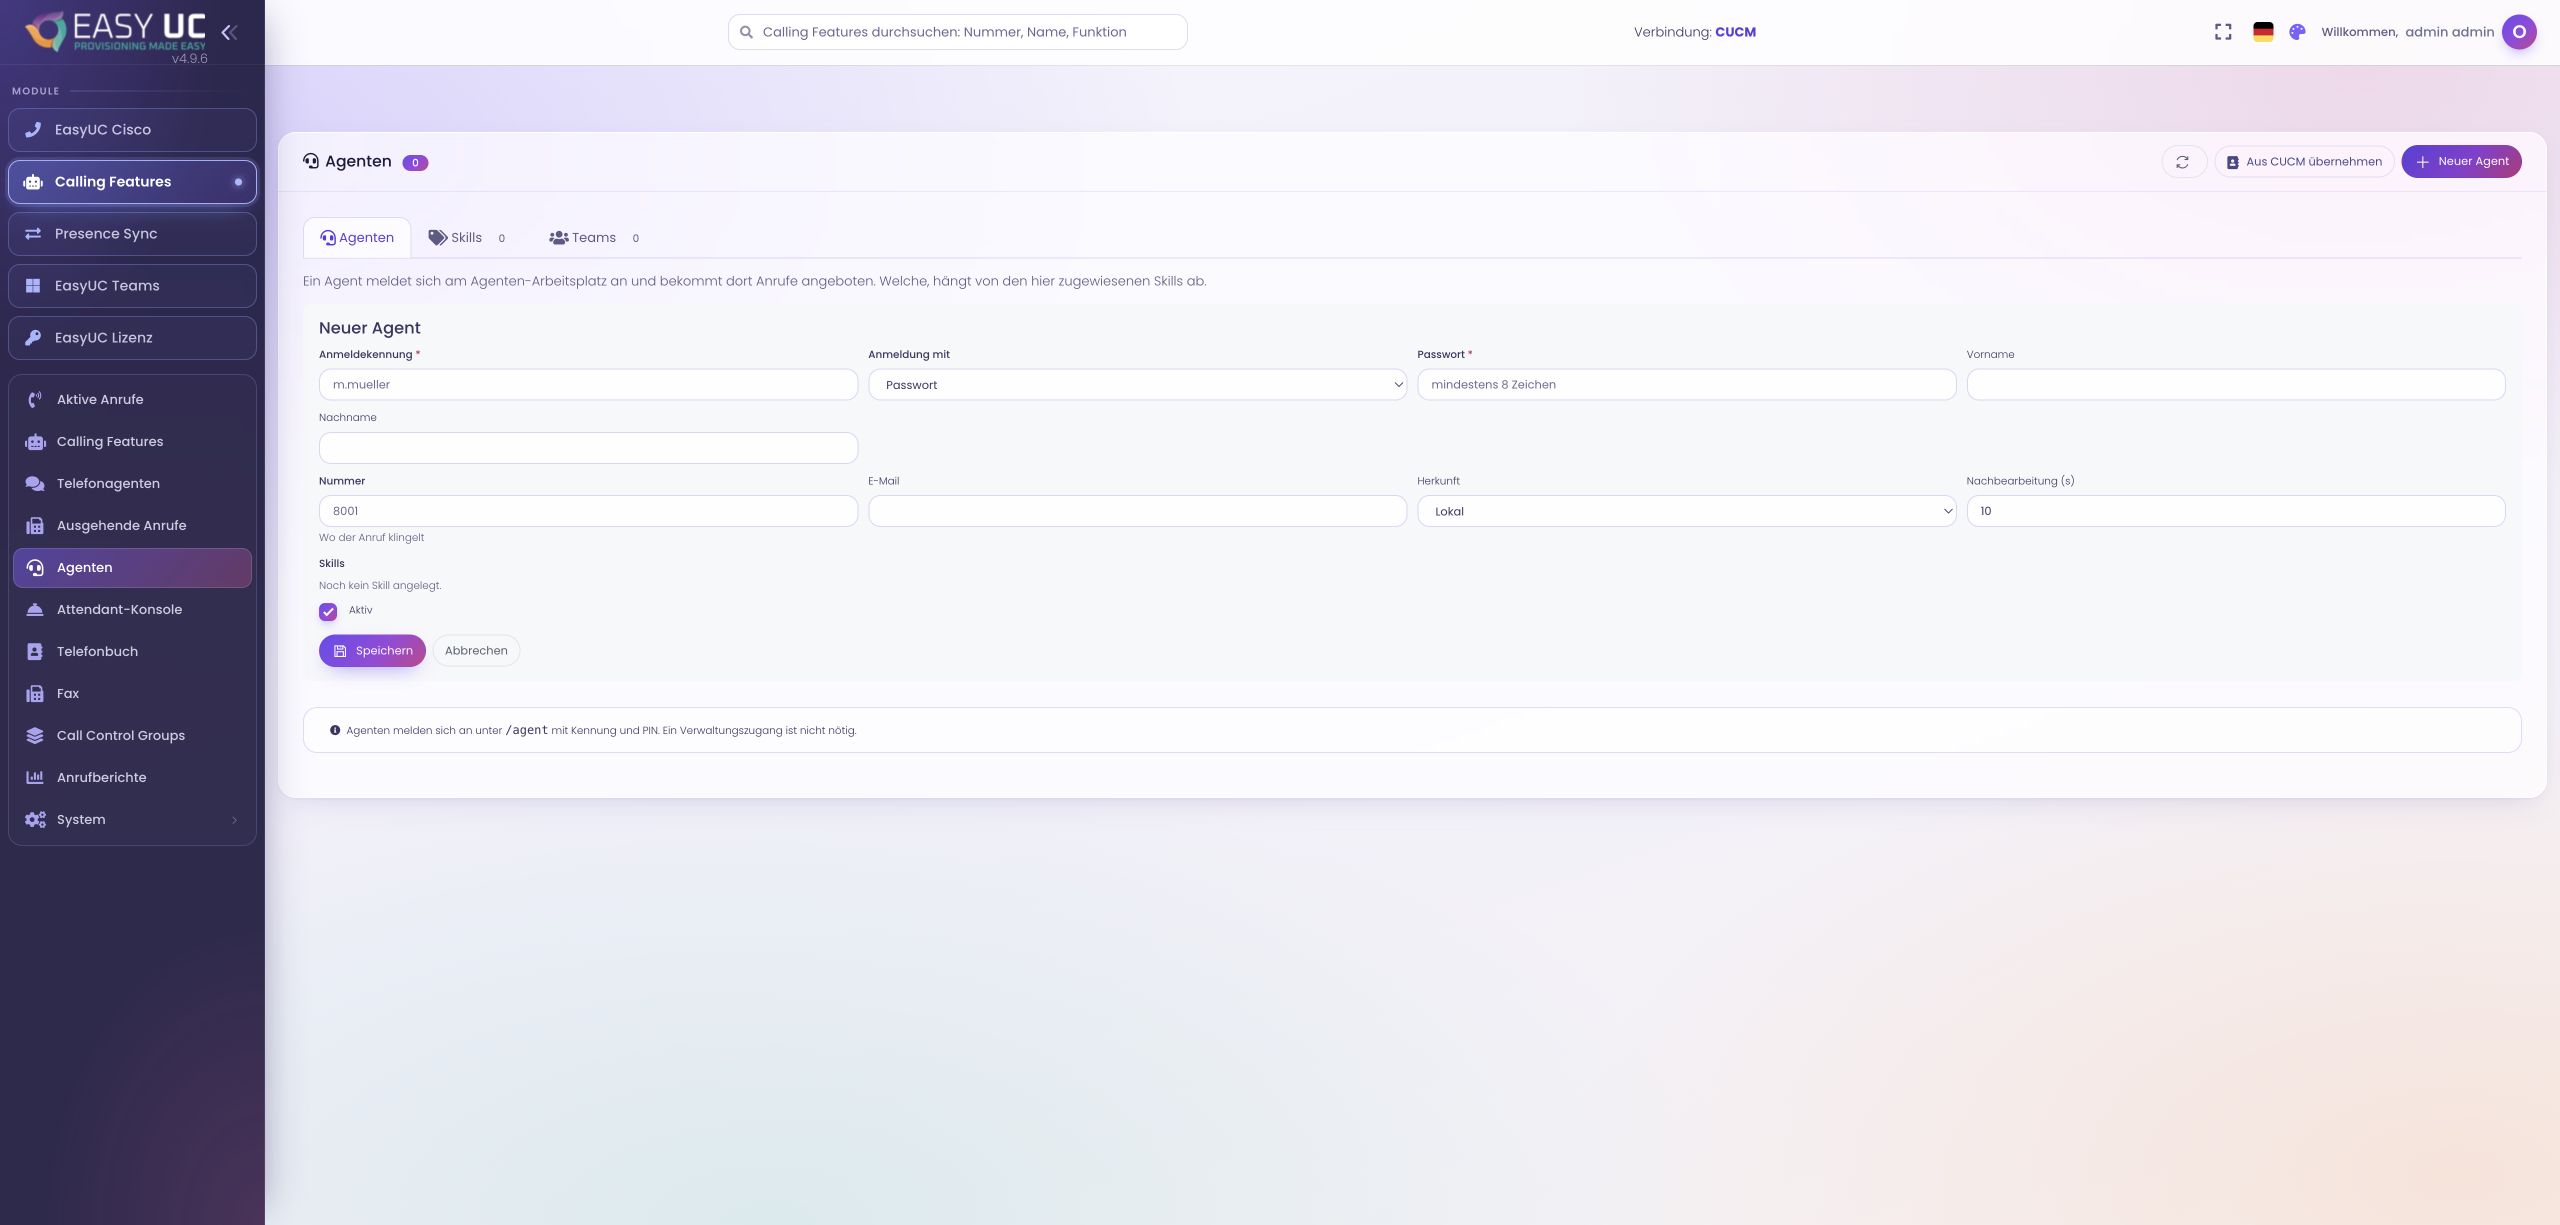
Set up agents and skills Define sign-in, the ringing number and responsibilities in one place.
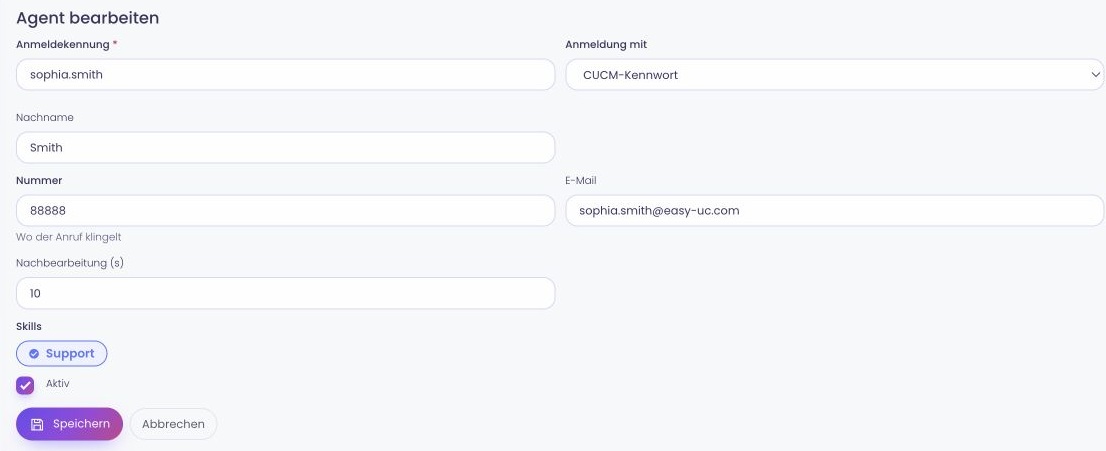
Each agent has a separate sign-in for the agent workplace. Administration brings together the sign-in method, the number where calls ring, wrap-up time and skills. A skill describes a responsibility, such as support; the agent block in the call flow uses this assignment when offering calls.
The screenshot shows the new-agent form, not a signed-in workplace. Depending on the configured integration, you can create local agents or take over users from CUCM or Microsoft Teams. The form defines the origin and available sign-in methods; agents then sign in at /agent.
How to use this feature
- Create skills
Open Skills and add the required responsibilities with a name and description.
- Add the agent and sign-in
Open New agent or take over a user from an available integration. Set the sign-in name and choose the appropriate method, such as a password or PIN.
- Assign the ringing number and skills
Enter the ringing number, set wrap-up time and select the relevant skills. Use Active to control whether the agent is enabled.
- Save and sign in to the workplace
Save the agent. At /agent, they sign in with the configured credentials and can set their status to Ready or Pause.
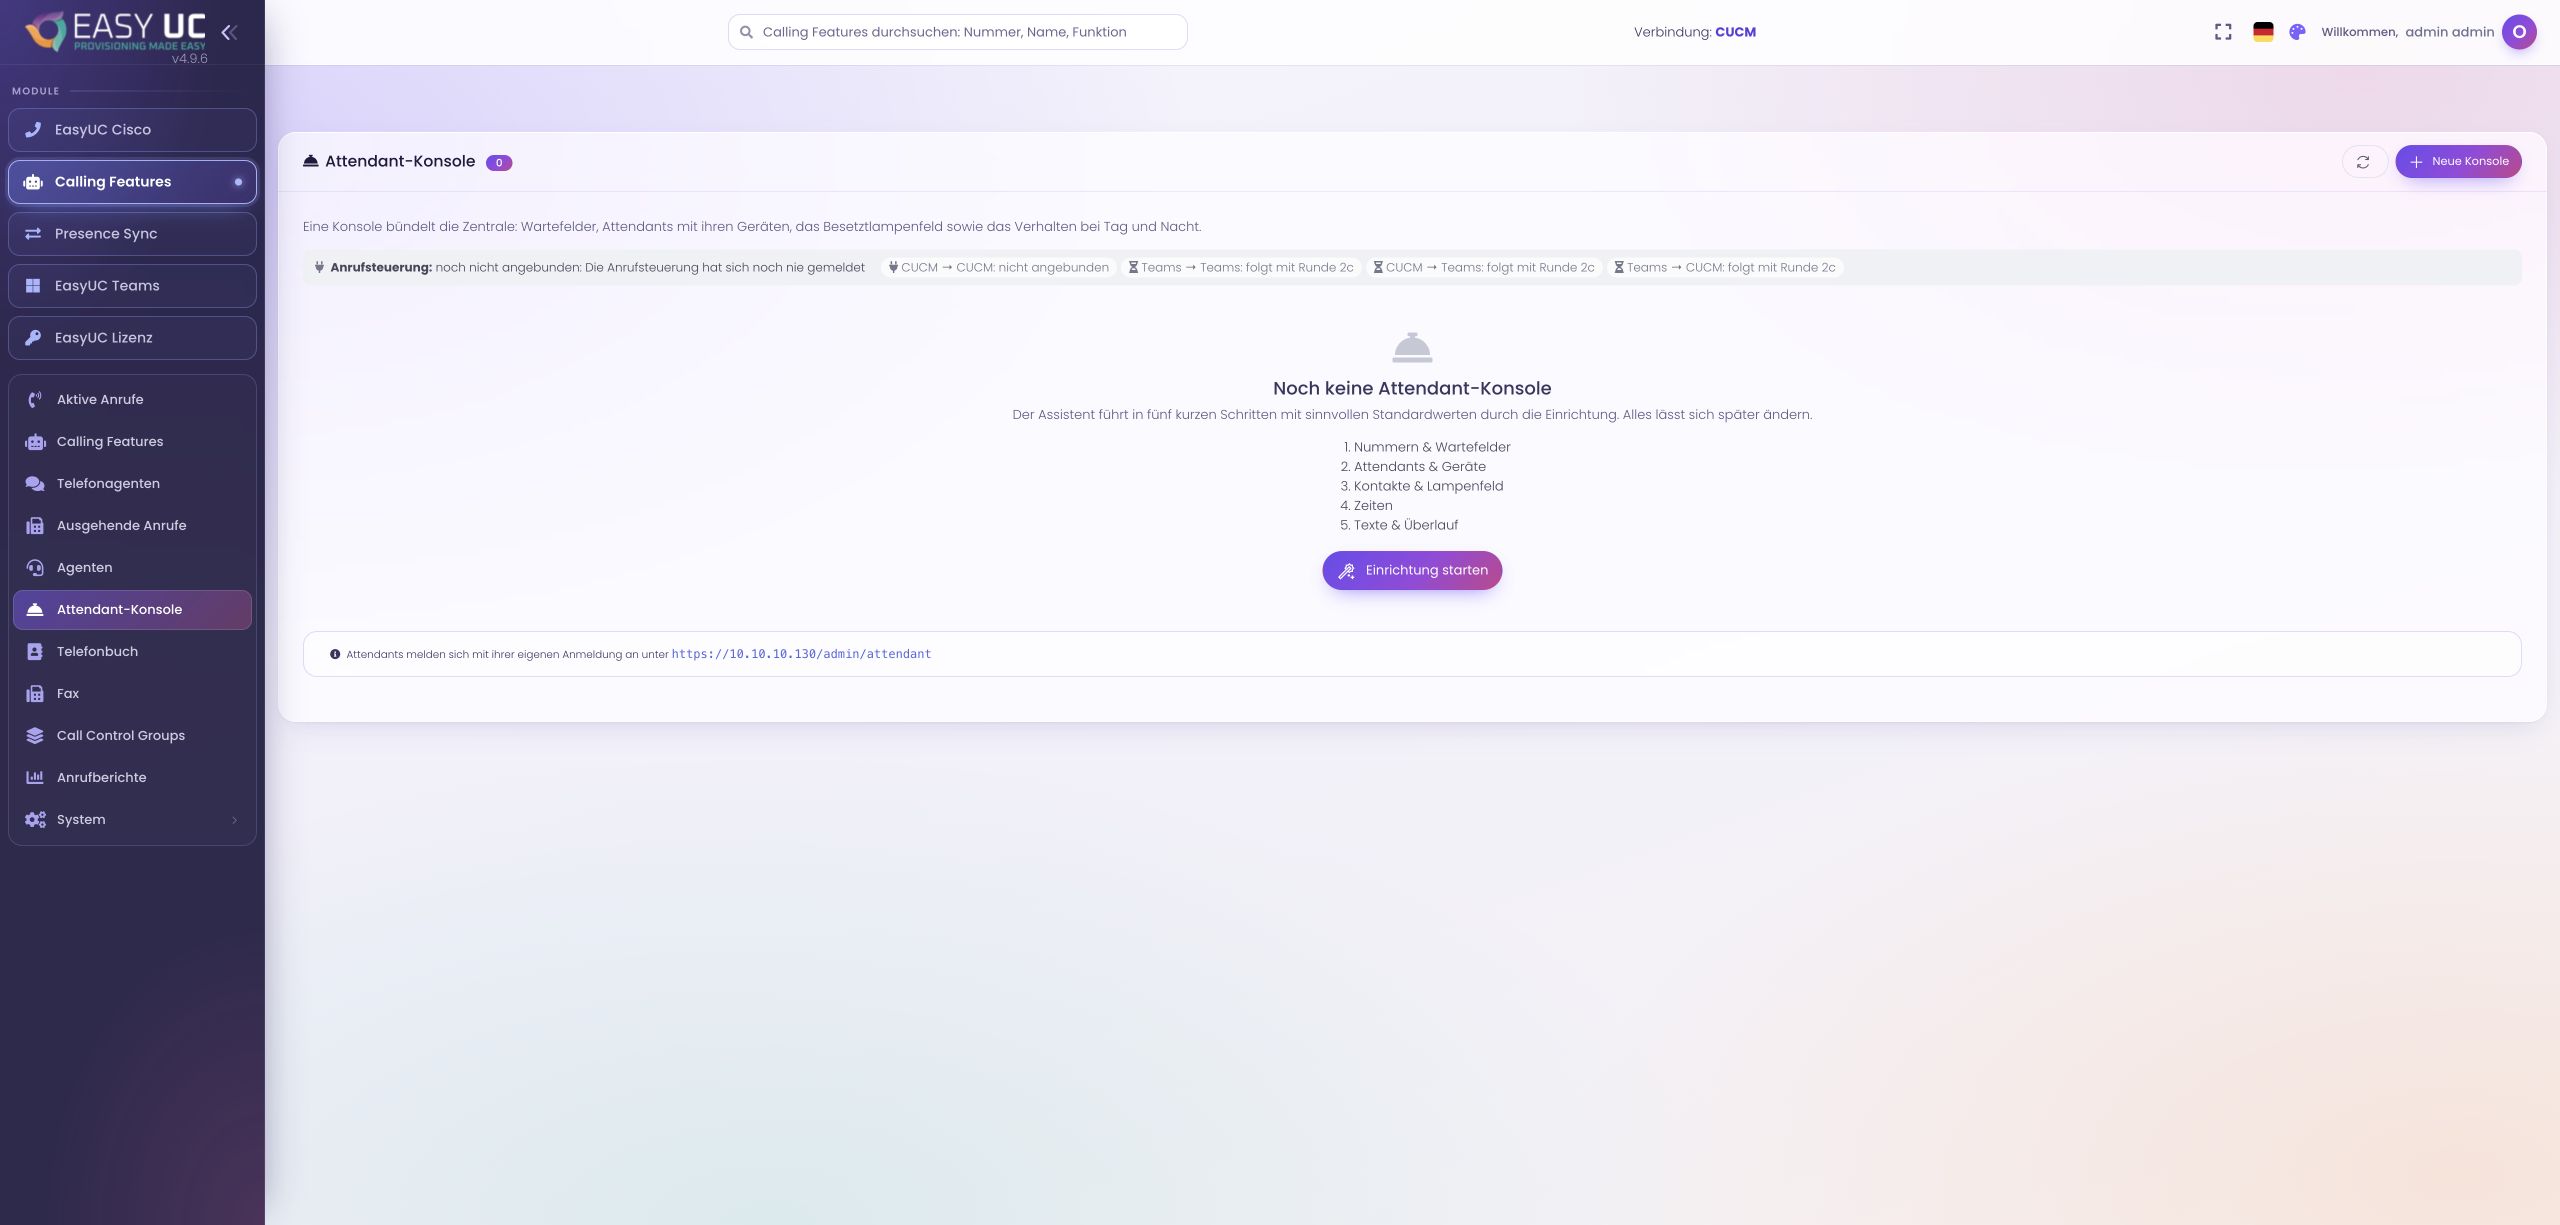
Set up an attendant console Configure queues, attendants, devices and availability rules together.
An attendant console brings together the settings for the reception desk. The wizard covers five areas: numbers and queues, attendants and devices, contacts and busy lamp fields, schedules, and announcements and overflow. You can save an unfinished setup and continue later.
The screenshot shows the start of setup: no console has been created in the lab and call control is not connected yet. The overview and setup checklist show the connection and configuration status, making it clear what still needs to be configured for operation.
How to use this feature
- Define numbers and queues
Start setup, name the console and add its queues. Assign the call scripts that route incoming calls into these queues.
- Assign attendants and devices
Add attendants with their sign-in details and assign the devices they will use to answer calls.
- Configure contacts and schedules
In Contacts & busy lamp field, select the phonebooks and buttons. In the next step, define the rules for daytime, nighttime and holidays.
- Review announcements, overflow and readiness
Configure announcements and overflow actions for each queue, then save the setup. Review the setup checklist and call-control status afterwards.
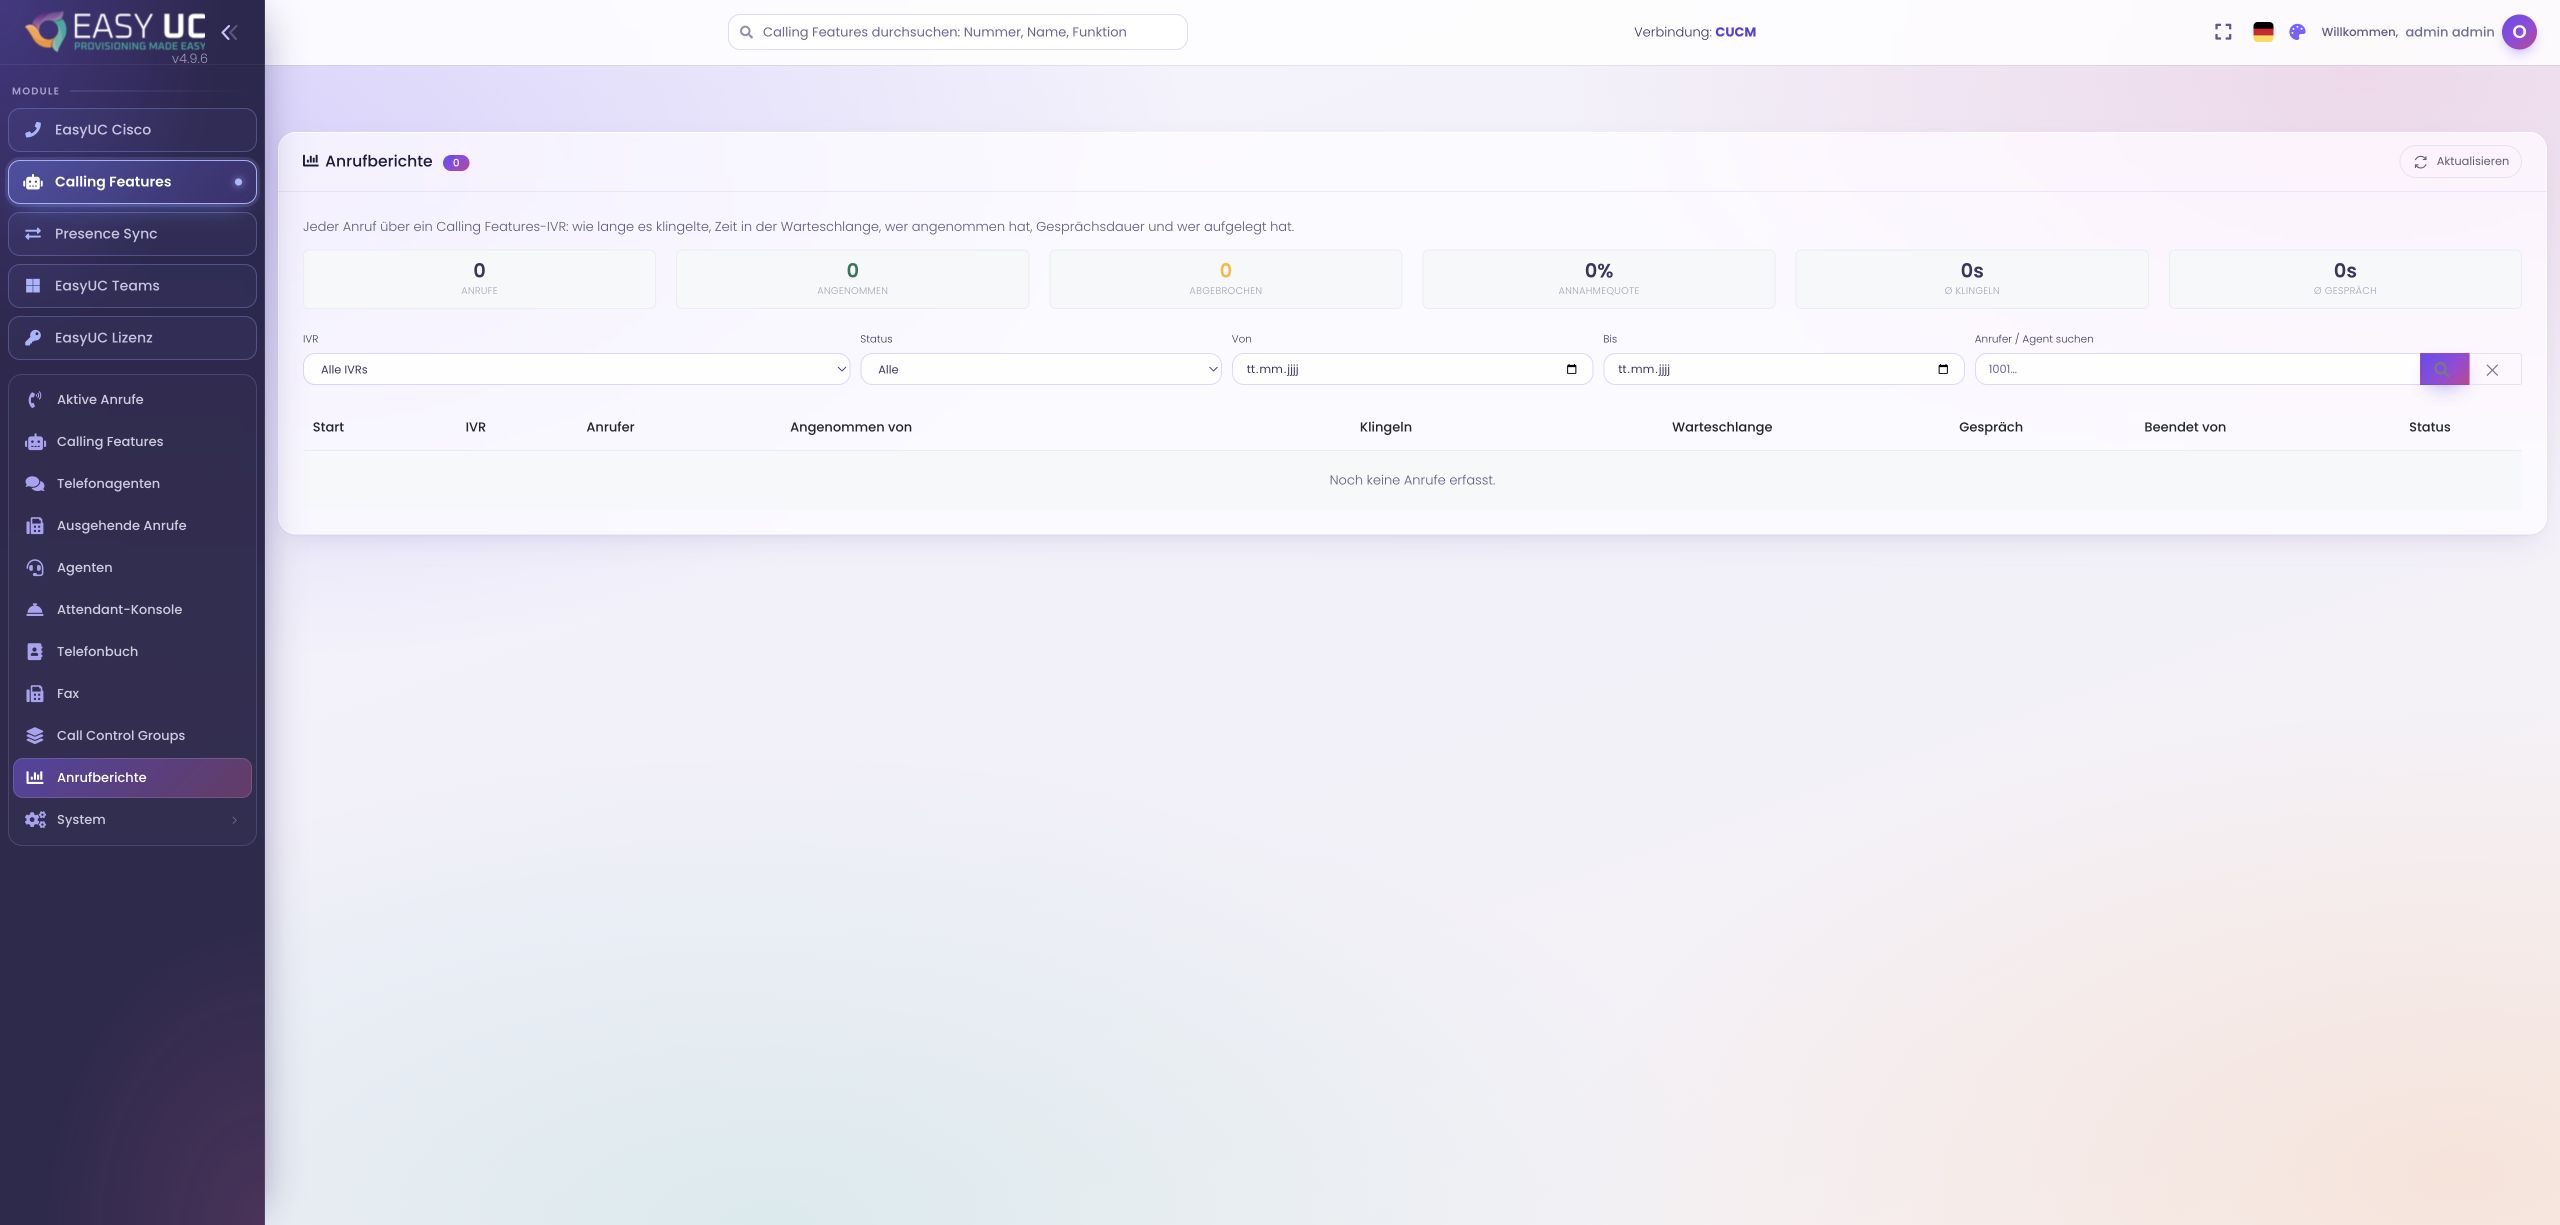
Review ACD calls and waiting times See which calls were answered, how long they waited and who ended each conversation.
Call reports cover calls passing through an ACD AI voice application. Indicators summarise total, answered and abandoned calls, answer rate, and average ringing and talk time. IVR, status and date filters narrow the report; search finds callers or agents.
The table shows call start, IVR and caller, the answering agent, and ringing, queue and talk durations. It also records which side ended the call and its status. The original capture comes from a lab without recorded ACD calls, so it shows the filters and an empty results table.
How to use this feature
- Open call reports
Open call reports in the ACD area. Choose a voice application or include all IVRs.
- Set dates and filters
Set the from/to dates and, if needed, a status. Enter a caller or agent in the search field and apply the filters.
- Review indicators and individual calls
Compare the indicators with individual rows. Distinguish ringing time, queue waiting time and actual talk time; use pagination for further results.
- Refresh the results
Refresh the report to include newly recorded calls. Reset the filters to return to the unfiltered selection.
How does this become a working process? Our use cases show each step directly in the EasyUC interface.
Explore practical examples